Listed below are the general steps to migrate UCA-owned Apple devices from Mosyle to Jamf. Pictures have been included to help guide the process. The overall process is straightforward and quick, with most migrations taking less than 10 minutes per device. If you get stuck on any particular step, please contact the IT Help Desk at 501.450.3107 or the Directory Services team at directoryservices@uca.edu and we will be happy to assist.
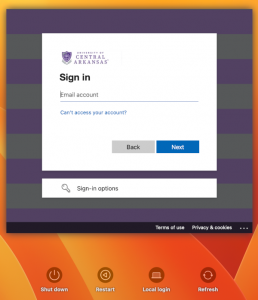
Important Note: After migration to Jamf is complete, you will begin signing into the device using your full UCA email address (including @uca.edu) instead of only your username (see bottom of this page). Otherwise, there are minimal user experience changes with the new MDM.
If your device is running on wireless and connected to Domain Wireless on campus, you may be disconnected when the existing profiles are removed. If this occurs, simply connect to the UCAWIRELESS connection to continue the migration. To avoid the disruption, you can change your wireless connection before starting the migration utility.
Getting Started
(The following steps are for user-initiated migrations. If the process starts automatically on your device, proceed to the “Preparing” section below.)
- Click the Launchpad icon in the dock and select the Manager application. If Launchpad is not available, use Spotlight (Command + Spacebar) to find the Manager application.


- Click Self Service on the login screen. You do NOT need to login here.
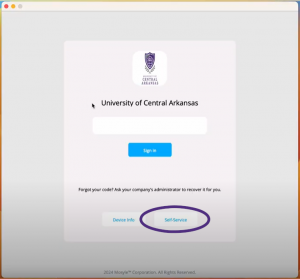
Note: If you are already logged in to Mosyle Manager, the Self-Service option will appear near the top right corner of the Manager window. Click Self-Service and then My Apps from the dropdown menu.

- Select My Apps from the left hand menu, find Jamf Migrate in the list of applications and click Install.
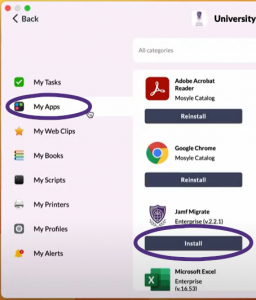
Note: If you receive an error at this point, please contact the IT Help Desk at 501.450.3107 for assistance.
Preparing
- This will begin the launch of the migration utility. Please be patient as it loads and begins.
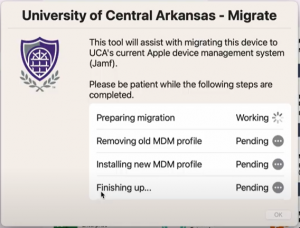
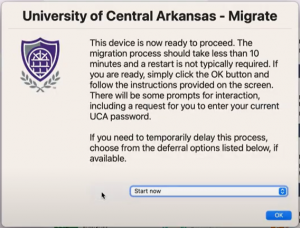
- Once the utility is prepared, you will be prompted to start the process. Click OK to continue.
Installing Profiles
- Once the new profile is ready to be installed, follow the on-screen instructions to install the profile. There are a few different scenarios for this step, but the on-screen instructions will walk you through what needs to be done. Listed below are two possible scenarios.
- Scenario #1: Click the Date & Time in the top-right corner of the screen to expand notifications, where you will see a Device Enrollment notification. Click this notification to continue.

- Scenario #2: If the Profiles window is automatically opened, double-click the MDM Profile and click Install on the prompts that appear.

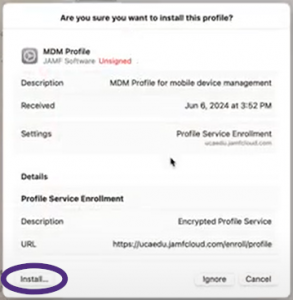
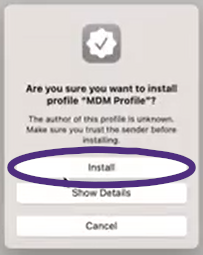
- Scenario #3 (macOS Sonoma): The Remote Management dialogue will launch full screen. Click Enroll to continue and follow the prompts.
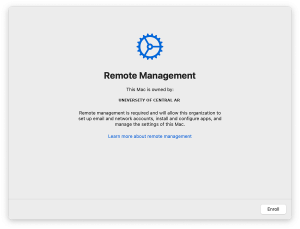
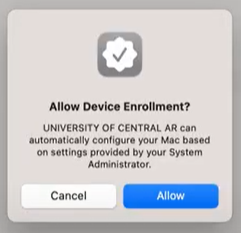
- Click Allow if prompted to allow device enrollment.
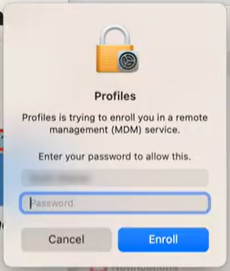
- For most scenarios, you will be prompted for a password. Please enter your current UCA password and then click the Enroll button.
Finishing Up
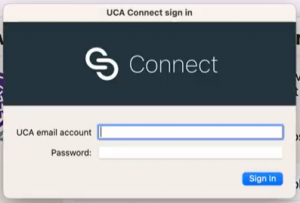
- As the utility finishes up, you will be prompted to sign in to UCA Connect. Enter your full UCA email address and current password and click Sign In.
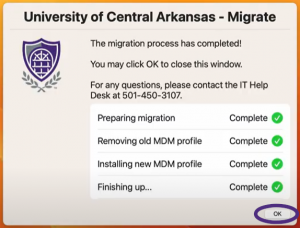
- Once the migration utility has completed, simply click the OK button. You have successfully installed the new MDM profiles.
Post-Migration: After the migration to Jamf, your login screen will change and you will be required to use your full UCA email address. The screen will look similar to the screenshot below. When using your device without internet connectivity, choose the ‘Local Login’ option and enter your UCA credentials.
