The BearCard’s Online Photo Submission site is a wonderful tool to provide you with the convenience of submitting your BearCard image online. First time students (transfers included) participating in orientation should submit a photo, following the instructions and guidelines below. The entire submission process is very fast and easy, however, the biggest issue that will delay your BearCard is your image not meeting standards.
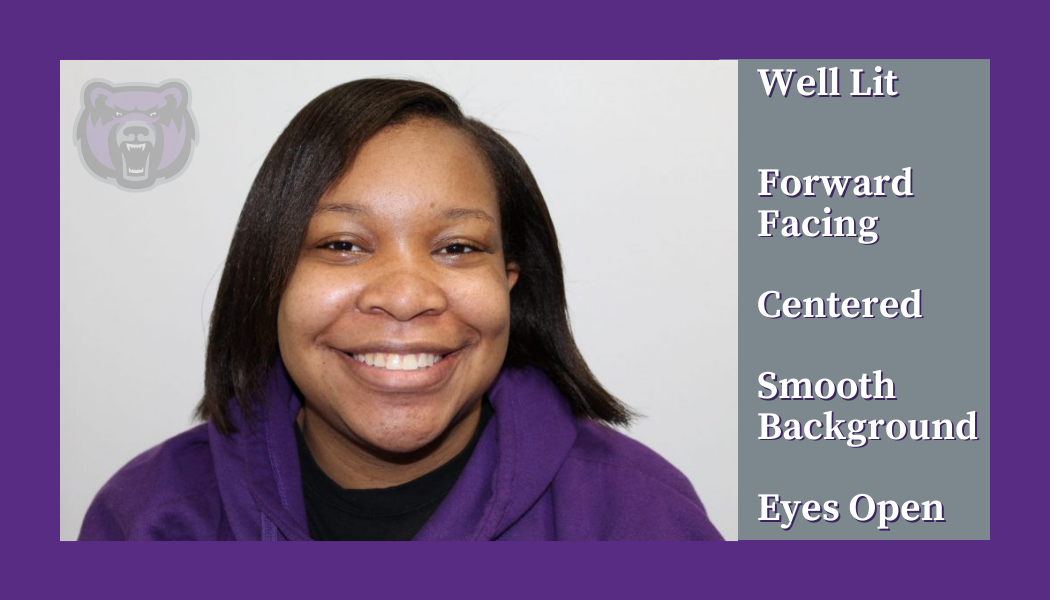
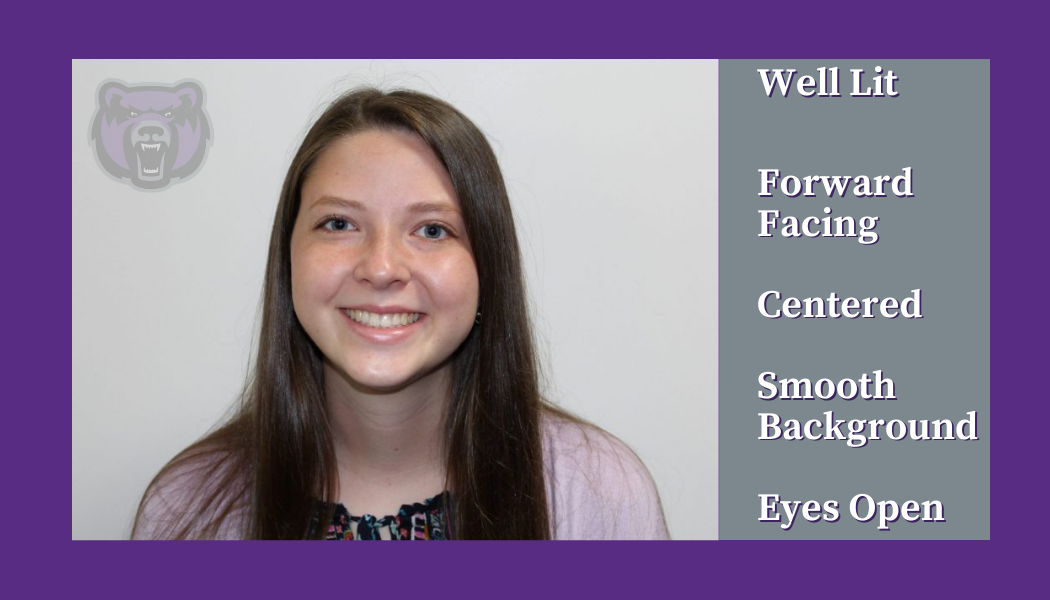
Appropriate Photo Examples:
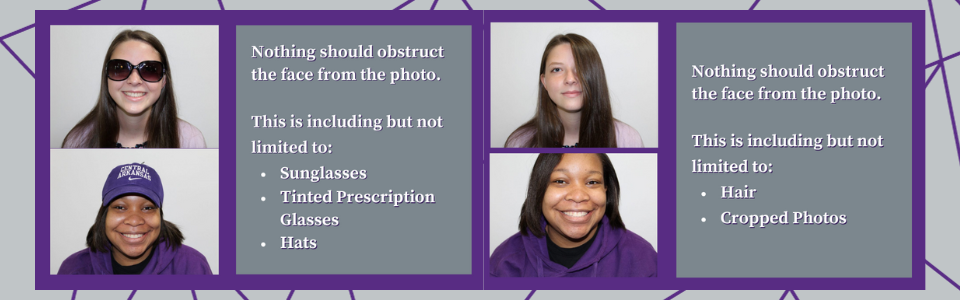
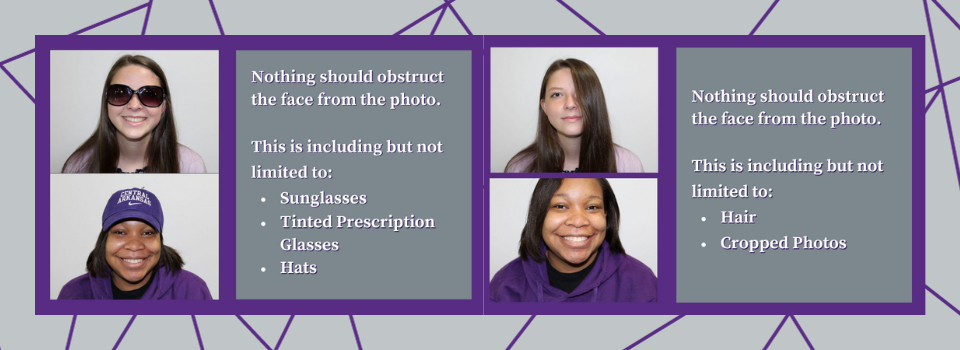
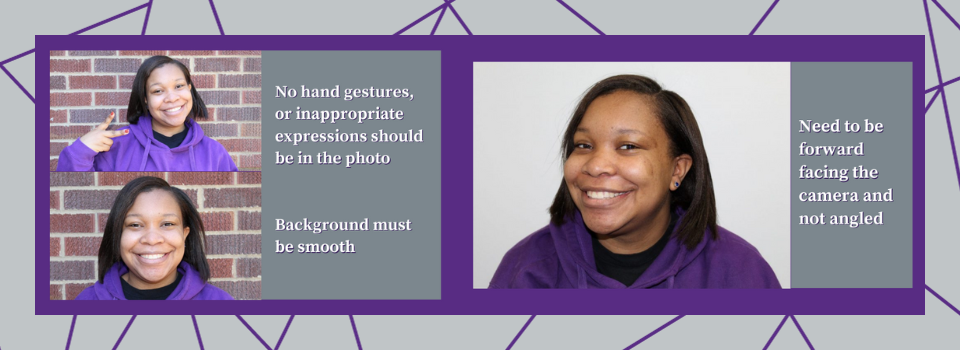
Inappropriate Photo Examples:


Tips when submitting your photo
– Be sure that photos are NOT in “live” mode.
– Photos that are too big will display a message stating the photo cannot be greater than 2MB, please crop the photo until it is just around your face and re-submit.
– Photos that are too small will display a message stating the photo must be greater than 300KB. Try taking a photo using the rear-facing camera and re-submitting.
Submit Your Photo Through eAccounts App
1. Download the Transact eAccounts and Microsoft Authenticator apps in your app store. The eAccounts app will ask you for a code. Use the Microsoft app to get the code. Start with the eAccounts app and it will tell you what to do.
2. Take 2 photos.
- A photo of yourself following the photo criteria below. It’s best to set a timer or have someone else take the picture.
- Your government issued ID (i.e. Driver’s License, state ID, passport). Do not include yourself in the image (aka selfie!). We need a close up of your government ID with the image and all the information included so we can identify you.
3. Open eAccounts app. Tap the setting gear in the top right corner. Tap ‘Submit ID Photo’. If you do not see this, email bearcard@uca.edu. Tap ‘Get Started’. It will redirect you to CloudCard.
4. Follow the app’s instructions. Please wait for the photo to process before clicking next. When it says ‘Done’, please go to the bottom and click ‘Submit and Sign Out’.
5. You will be notified via email if your photo was accepted or denied. Please wait for the photo to be approved. Only one photo may be submitted at a time.
6. Add your BearCard Mobile. Once you receive an approved photo email, you can add your BearCard Mobile from the eAccounts app by clicking the ‘add to (payment method)’ button.
Submit Your Photo with Email Link
1. Check your email. Once your UCA email is assigned, make sure to keep an eye out for an email from “UCA BearCard Online Photo Submission”. Your BearCard image can only be submitted using your unique link from this email.
2. Take 2 photos.
- A photo of yourself following the photo criteria below. It’s best to set a timer or have someone else take the picture.
- Your government issued ID (i.e. Driver’s License, state ID, passport). Do not include yourself in the image (aka selfie!). We need a close up of your government ID with the image and all the information included so we can identify you.
3. Click the link in your email. You may use your mobile device or computer. Do not copy and paste the link. You have to click on the link in the email.
4. Follow the instructions. Please wait for the photo to process before clicking next. When it says ‘Done’, please go to the bottom and click ‘Submit and Sign Out’.
5. You will be notified via email if your photo was accepted or denied. Once your photo is submitted and approved, you cannot submit another photo.
6. Add your BearCard Mobile. Once you receive an approved photo email, you can add your BearCard Mobile by following the BeardCard Mobile Instructions.
Official Photo Guidelines
The picture for the UCA BearCard must show a clear, front view of the applicant’s face. The applicant should have a neutral expression, with the mouth closed and eyes open, looking directly ahead. In general, the applicant’s head, including both face and hair, should be shown from the top of the forehead (at the hairline) to the tip of the chin on top and bottom and from hairline side-to-side.
- No hats are permitted
- No sunglasses are permitted

- Look directly into the camera, not down or to the side
- Bangs (fringe) should not obscure the eyes or an unreasonable amount of the face
- No hand gestures are permitted in the picture
- Head coverings are only acceptable due to religious beliefs or for medical reasons, provided the head covering does not:*
- Obscure or obstruct a full front view of the face.
- Display any logo, insignia, symbol, or regalia, word or words, letter, number or character, or any combination thereof, or graphic design other than the overall pattern of the fabric or material.
- Cast a shadow onto the face.
- Eyeglasses worn on a daily basis can be worn for the photo; however, there should be no reflections from the eyeglasses that obscure the eyes. Dark glasses or nonprescription glasses with tinted lenses are not acceptable unless you need them for medical reasons.
* The Bear Card Office reserves the right to ask for additional verification showing religious or medical status.
Photo Criteria
Do’s
– Yes, you can smile!
– Current color photo in pdf, jpg or png format
– Neutral color (white, off-white, cream, beige, light gray) and smooth background
– Centered and front view of full face
– Cropped from slightly above head to chest
– Proper lighting
– Eyes open and visible
– Wear prescription glasses if you normally do so; however, there should be no reflections from the eyeglasses that obscure the eyes.
– Photo size between 300KG to 2MB
– Head coverings for religious beliefs are acceptable, provided that the head covering shows a full view of the face, does not cast a shadow onto the face, and shows an overall pattern in the fabric or material (i.e., not a graphic design).
Don’t
– Wear hats, sunglasses (or tinted glasses) or other items that obscure the face
– Glare on glasses; closed eyes
– Shadows on the face
– Other visible people, pets or objects in the photo
– Group photos
– Inappropriate expressions
– Blurry photos
– Black and White photos
– Shirts cannot be the same color as the background
– Photos with your hand resting on your face
– Crop off the top of your head or side angle your face
– Heavily filtered photos (i.e. Snapchat). Filters will also affect the size of the photo.